
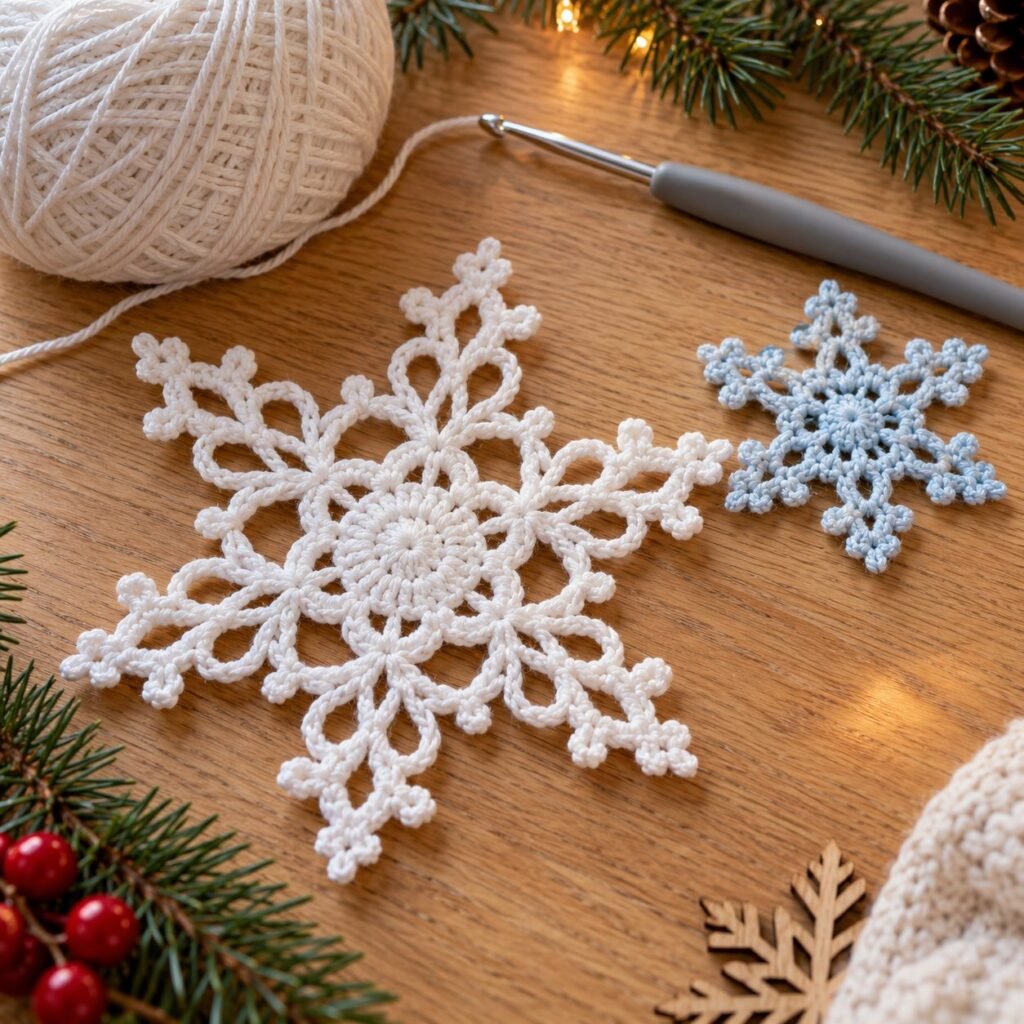
Six points, four rounds, one cup of tea. This easy crochet snowflake pattern is written for beginners: no fancy stitches, just chains, single and double crochet. Make one for the tree tonight, then a whole flurry for gift tags, garlands and window decorations.
In this tutorial
What You Need
- Worsted weight (#4) cotton yarn in white, ice blue or silver (about 5 g per snowflake)
- 4 mm (G-6) crochet hook
- Tapestry needle and scissors
- Fabric stiffener, or school glue and water (see stiffening below)
- Rust-proof pins and a piece of foam or cardboard for blocking
Abbreviations (US terms): MR = magic ring, ch = chain, sl st = slip stitch, sc = single crochet, dc = double crochet, sp = space. New to US terms? See our US vs UK crochet terms chart.
How the Snowflake Is Built
Every crochet snowflake follows the same logic: a small circle in the middle, a round that splits the circle into six sections, and then points worked into each section. Because snowflakes have six arms, every round is built on a multiple of 6 – which is why we start with 12 stitches.
Cotton is the best choice. It holds a crisp shape after stiffening, while acrylic stays soft and can sag. If you can, start with a magic ring so the centre closes tightly with no hole.
Free Crochet Snowflake Pattern
Work in joined rounds. Do not turn.
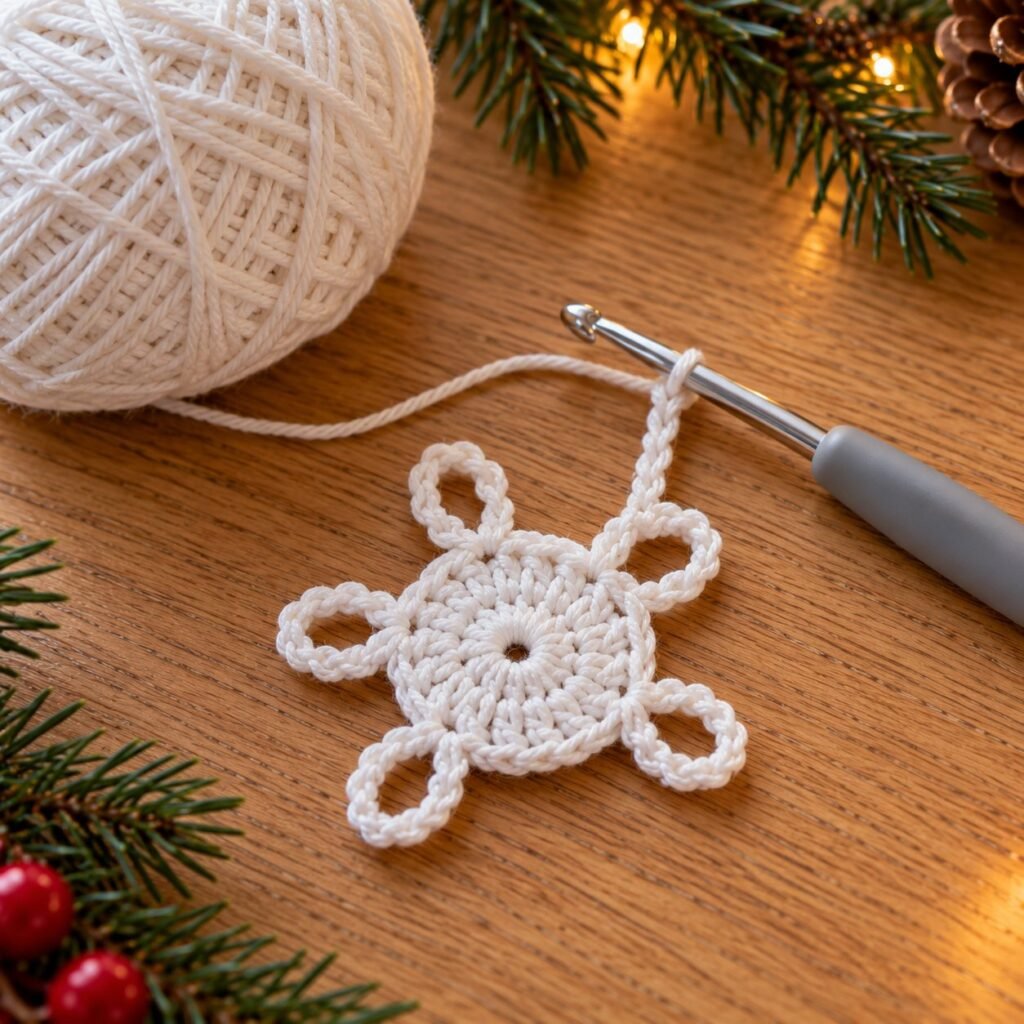
Round 1: MR, ch 3 (counts as first dc), 11 dc in the ring. Pull the ring closed and sl st to the top of the beginning ch-3. (12 dc)
Round 2: Ch 1, sc in the same stitch, ch 3, skip next st, *sc in next st, ch 3, skip next st* 5 times. Sl st to the first sc. (6 sc, 6 ch-3 spaces)
Round 3: Sl st into the first ch-3 sp. Ch 3 (counts as dc), (dc, ch 2, 2 dc) in the same sp, ch 1. *(2 dc, ch 2, 2 dc) in the next ch-3 sp, ch 1* 5 times. Sl st to the top of the beginning ch-3. (6 shells, 6 ch-1 spaces)
Round 4: Sl st in the next dc and into the ch-2 sp. Ch 1, *(sc, ch 4, sc) in the ch-2 sp, ch 3, sc in the next ch-1 sp, ch 3* 6 times. Sl st to the first sc. Fasten off and weave in the ends. (6 long points, 6 small points)
Your snowflake will look curly and floppy at this point. That is normal – the stiffening step is what turns it into a flat, crisp star.
Want it smaller? Use size 10 cotton thread and a 1.75 mm steel hook for a delicate snowflake of about 2.5 in / 6 cm. The pattern is exactly the same.
Free printable version
Prefer paper? Download this free tutorial as a printable PDF to keep next to your yarn.

Keep crocheting
Your next free pattern: Free Crochet Christmas Ornament Pattern: Mini Wreath + Ornament Tips. Free crochet Christmas ornament pattern: a ruffled mini wreath in 20 minutes, plus tips to stiffen, hang and style handmade ornaments.
Free pattern · step by step · US terms
How to Stiffen a Crochet Snowflake
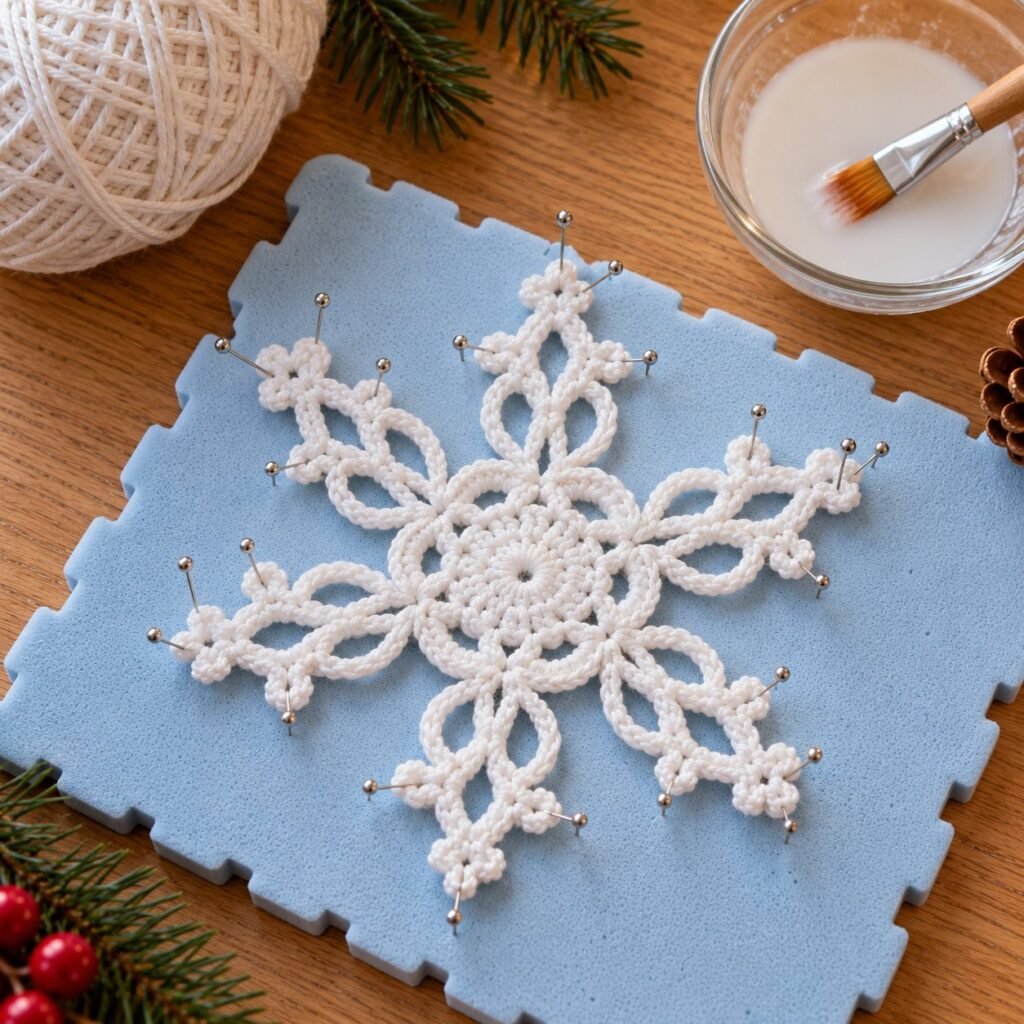
- Mix one part school glue (PVA) with one part water, or use a ready-made fabric stiffener.
- Soak the snowflake for a minute and gently squeeze out the excess.
- Pin it flat on foam or cardboard covered in plastic wrap. Pin the centre first, then each long point, then each small point, so all six arms are even.
- Leave it to dry for 12–24 hours before unpinning.
Tip: a round plate or a printed circle under the plastic wrap makes it easy to line up all six points.
Ways to Use Your Snowflakes
- Tree ornaments: tie a loop of silver thread through one long point. They pair beautifully with our easy crochet Christmas tree ornament.
- Gift toppers: glue one onto kraft paper wrapping instead of a bow.
- Window garland: string 8–10 snowflakes on fishing line at different heights.
- Advent fillers: a quick make for one of the days in our crochet advent calendar ideas.
Frequently Asked Questions
Why is my snowflake curling into a bowl?
Your stitches are tight compared with your chains. Go up half a hook size, or add one extra chain to each ch-3 in Round 2. Stiffening will also flatten a slight curl.
Can I use acrylic yarn?
Yes, but acrylic does not hold starch well, so the points stay soft. For crisp snowflakes, use 100% cotton.
How do I make the points even?
Count your chains carefully in Round 4, and always pin the six long points first when blocking. Small differences disappear once the snowflake is pinned and dried.
How long does it take?
About 15–20 minutes per snowflake once you know the pattern, plus drying time for the stiffener.
Happy hooking! 🧶 Want more free Christmas ornaments? Try our crochet Christmas tree ornament and the crochet candy cane.

Leave a Reply